Build feasibility guide
DIY Atmospheric Water Generator: What It Takes to Build One
A DIY atmospheric water generator uses a dehumidifier to cool humid air and collect the resulting condensation. A basic parts budget of roughly $300–$400 is a starting estimate, not a promise of drinkable water at that price. Output depends heavily on humidity, temperature and the machine; dry air may yield very little. Condensate from an ordinary dehumidifier needs an appropriate collection path, treatment and water-quality testing before you consider drinking it. Here is how to assess the build before buying parts.
How a DIY atmospheric water generator works
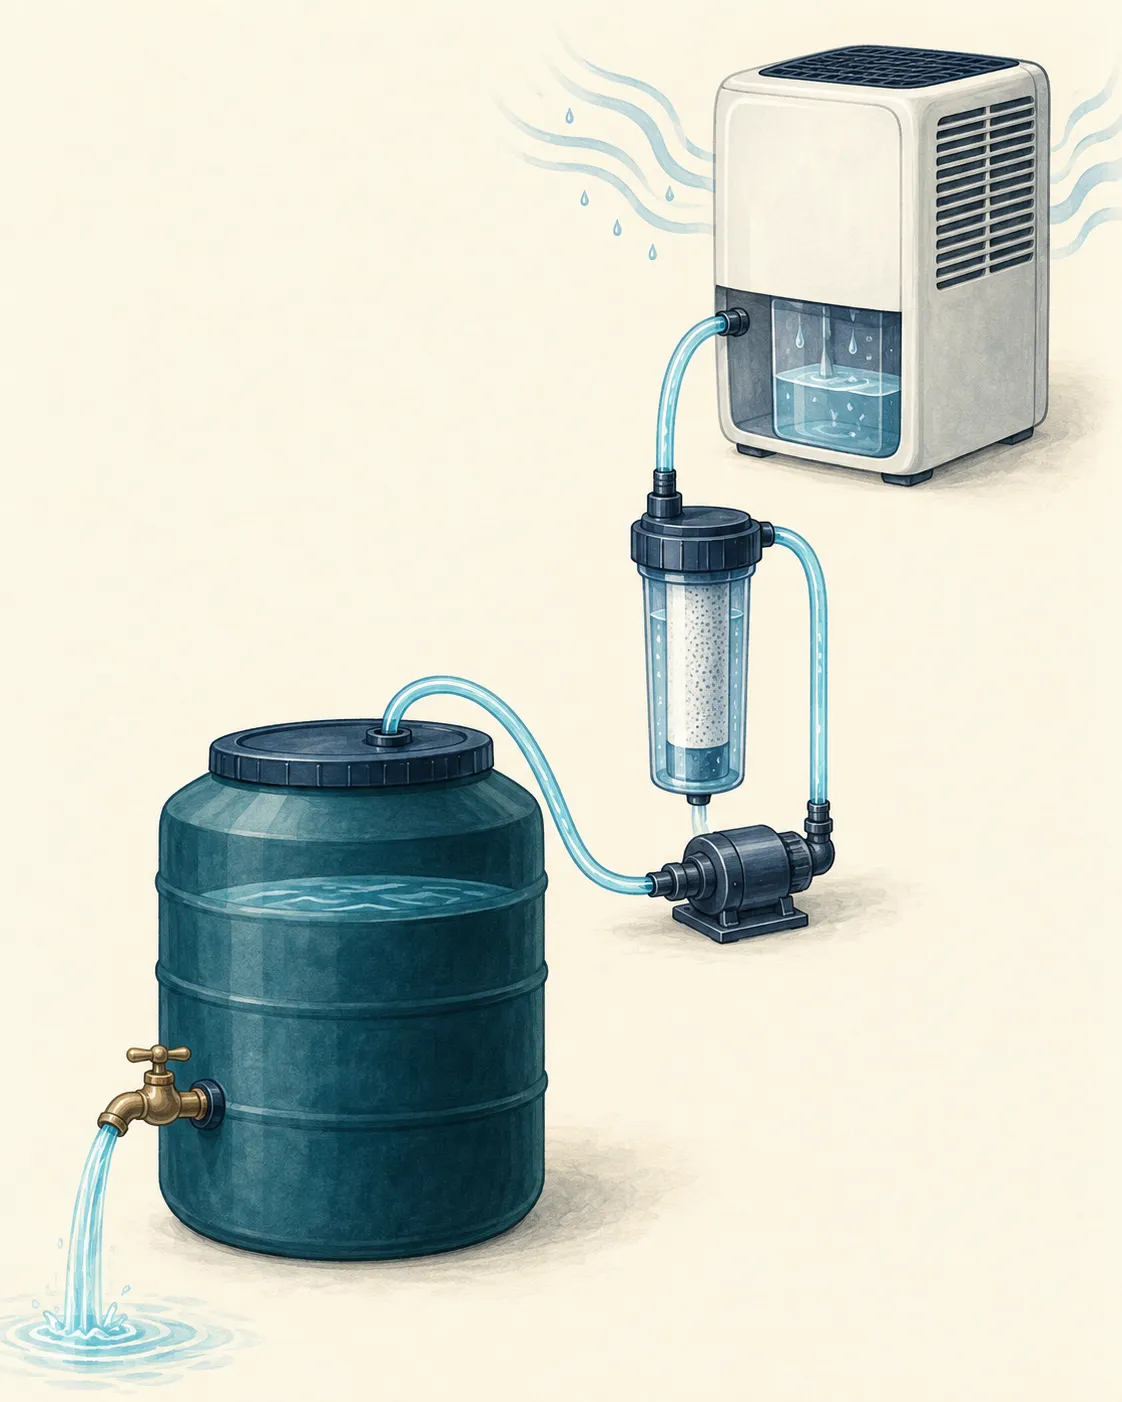
A compressor dehumidifier draws air across cold coils. Water vapor condenses, runs to a drain and can be routed into a separate collection container. This is the same physical process as a dehumidifier filling its bucket; the added work is collecting, treating and storing the water without introducing contamination.
Parts and likely cost
Start with a high-efficiency compressor dehumidifier that has a continuous-drain option. Its rated pint-per-day capacity is measured under specified test conditions, so it is not a forecast for your home. The source article's $300–$400 estimate covers a basic dehumidifier-based project; a drinking-water setup can cost more.
- Collection: manufacturer-compatible drain fitting, secure tubing and a covered, food-grade container.
- Treatment: filter or disinfection equipment selected for contaminants found in your collected water, rather than a generic filter bundle.
- Assembly: brackets, seals and basic tools to support a leak-free route without modifying electrical components.
- Optional power protection: use a voltage regulator only if your supply and appliance specifications call for one; it is not a universal requirement.
Budget separately for lab testing, replacement media and electricity. For a closer look at one proposed parts-and-plans package, see our Water Freedom System review and cost breakdown.
Humidity, output and electricity
Warm, humid air generally yields more condensate than cool or dry air. Around 50% relative humidity or higher may make a trial more promising; below roughly 30%, a conventional dehumidifier often collects too little to justify continuous running. These are planning cues, not hard operating thresholds. Temperature, airflow, defrost cycles and the unit's rating all matter.
Do not plan around the source article's gallon-per-day figures. Measure your own output over several days alongside room temperature and humidity. Record electricity use with a plug-in meter and divide the energy cost by gallons actually collected. Running a 500-watt unit for eight hours, for example, uses about 4 kWh before treatment equipment.
A practical assembly sequence
- Choose a unit with a manufacturer-supported continuous drain. Keep the appliance intact and follow its electrical and placement instructions.
- Fit compatible tubing to the drain and route it downhill to a clean, covered collection vessel. Use food-contact materials downstream where possible.
- Install the treatment stages recommended for the actual water-quality results, then transfer water to sanitized storage.
- Check for leaks, measure yield and send a sample to a qualified laboratory before any drinking use.
Clean the drain, tubing and container before first use and on a continuing schedule. Standing condensate and wet surfaces can support microbial growth; a clear-looking batch is not a safety test.
Making collected water safer to drink
An ordinary dehumidifier is built to remove moisture from air, not to produce potable water. Dust, microbes and materials in the collection path can affect the condensate. A ceramic or sediment filter removes particles; activated carbon addresses some chemicals and odors; reverse osmosis can reduce certain dissolved contaminants; properly applied UV or disinfection targets microbes. No single stage makes an unknown source automatically safe.
Ask a certified drinking-water lab which chemical and microbial tests suit your setup, then choose treatment for those findings and retest after changes. Follow each component maker's cleaning and replacement instructions. If using boiling or chemical disinfection for microbial risk, remember that the EPA's emergency disinfection guidance says these methods do not remove heavy metals, salts or most other chemicals.
When the project makes sense
This can be an interesting supplemental water project in a humid climate, especially if you already need dehumidification or can power the unit with available renewable energy. It is a weak primary-water plan in a dry climate. Electricity, machine noise, seasonal output, cleaning, filter changes and testing all add work and cost. Compare the measured cost per usable gallon with your other water options before treating it as a savings or self-sufficiency solution.
Common build questions
Is dehumidifier condensate the same as distilled water?
No. Condensation separates water vapor from air, but a dehumidifier's coils, drain and storage surfaces can introduce contaminants. Do not assume it is drinkable or chemically pure.
Can I collect water in the built-in bucket?
For a drinking-water project, a direct drain into a clean, covered container is easier to keep sanitary than a frequently opened bucket. The collection path still needs cleaning, treatment and testing.
Can solar power run the generator?
Potentially, if the solar and battery system can meet the appliance's startup and running demands. Size it from the actual unit's specifications and measured use; solar power does not overcome low humidity.
Next step
Check the plan against your conditions
If a prepared build guide interests you, compare its parts list and claims with your climate, electricity cost and water-testing plan before buying.
Review the Water Freedom System plan →